There are many people who buy a laser engraver and find that it comes with a handy container. When I found out that there was foam in it, I wanted to use a laser engraver to cut the foam board. So, the first thing to learn is how to laser cut foam.
So, how to laser cut foam? Use spot mode, low power and low speed to reduce heat entering the work. Lower the laser nozzle to 3mm from the surface to maximize full air assist. Use different kerf offset values to produce accurately sized holes (-ve value kerfs) and plugs (+ve value kerfs).
The actual value depends on the type of foam used, the thickness and density of the foam, and the power of the laser used. For 30mm thick polyethylene (PE) foam, the settings I use with Lightburn are: Power 18% (~20W) / Speed 6mm/sec / Pierce 0.3 / Pierce Skip 0.2 / Cut Offset ±1.25.
For Ortur Laser Master 3, you need to use a dot setting of dot time 0.05 sec/dot interval 0.2 mm/dot length 0.3 mm.
- Laser Cut Foam - 30mm pe Foam
- Laser Cut 30mm Thick PE Foam - Internal and External Cut
Safety foam for laser cutting?
The three foams considered safe to cut are polyethylene (PE) foam, polyurethane (PUR) foam, and polyester (PES) foam. Expanded polystyrene (EPS) foam can also be laser cut, but requires extra care due to its flammability and non-self-extinguishing properties. Other types of foam often emit highly toxic fumes, see here for more details on how safe a laser is to cut.
The process of laser cutting foam
When cutting any new material, especially plastic-based materials. You have to make sure you know exactly what you are cutting and get the technical specs as much as possible.
Assuming you have Polyethylene (PE) foam, Polyurethane (PUR) foam or Polyester (PES) foam, set up a 25mm test square on your laser software of choice and select Spot Mode or equivalent laser processing mode . You can also start with the settings I ended up using and tweak from there.
Remember:
- If your foam is denser, you will need more power or slower speeds.
- If your foam is thinner, you will need less power or more speed.
- Use the longest focal length lens you have; 2.5" or 4" is best, but if you only have a 2" lens, you can still cut with that lens.
- Set up the material in your machine. I put foam on my needle bed because it allows air to flow over the top and bottom surfaces and reduces the chance of breakouts.
Position the laser nozzle approximately 3mm from the foam surface, this may not be necessary for foams less than 10mm thick.
Moving the nozzle closer to the workpiece makes air assist more effective, but in most setups this means that the laser beam will be focused below the surface, resulting in a larger kerf or cut width on the top surface.
Do the 25mm square test until you have a cut that is as vertical as possible, i.e. with as little taper as possible. The deeper the incision, the more the plug has a tendency to taper inward. However, the hole tends to have more vertical sides.
Laser bed precautions
If you don't like honeycomb beds then you can make some supports to lift the foam from the surface of the honeycomb. This also reduces the chance of the beam reflecting off the back of the foam. You may want to consider covering unused areas of your honeycomb bed to maximize airflow.
If you're using laminar strips, I'd still use a stand and shade the unused area for maximum airflow to the workpiece.
Manage cuts
Both xTool D1 Pro and Lightburn default to using the laser beam centered along the centerline of the artwork. This is usually not a problem as the cut width or cut is usually very small for most materials. For example, Acrylic's incision can be smaller than 0.5mm. When laser cutting foam, the incision becomes noticeably larger. In my tests with 30mm thick PE foam, the cut on the surface was 2.5mm. This means that cutting to the center of the wire will result in the plug being 2.5mm too small and the hole 2.5mm too large.
As mentioned, you can use foam for two types of cuts;
- Opening - This is where the external measurement is an important parameter and the internal material is processed.
- Secute - This is where internal measurements are important parameters and internal materials are the required components.
- Go back to the 25mm test square, then adjust the kerf value, make the cut and measure the hole and plug size to achieve the desired 25mm.
- To generate accurately sized holes, I used a cutout size of -1.25mm.
- To generate a sized plug, I used a cutout size of +1.25mm
- So I have two clipping settings in my Lightburn settings library; one for the holes and one for the plugs. The only difference is the cutout setting with positive or negative values.
Here is the definition from the xTool D1 Pro manual:
Sealing: The closed cut pattern does not need to use the seal compensation, but the unclosed pattern can be closed by it. However, if the seal is misplaced, there will be no compensation. Enter a distance in the Seal box, if the unclosed distance is less than this distance, sealing is required. The seal defines the overlap of the start and end of the cut.
Suture Compensation (Incision Settings): The incision is the width of the laser cut. By default, xTool D1 Pro cuts along the center of the path. This will result in a smaller outer cutout and a larger inner cutout. Cutout settings allow you to correct this.
My Laser Power Meter Project
The challenge with this project is that the Mahoney laser power meter itself is an irregularly shaped object that needs to be inserted into the vessel tube in an upright position. That means a 240mm high, 104mm diameter foam tube with a hollow laser power meter in the middle. The top and bottom of the laser power meter also need to be protected.
Plan for laser cutting foam
I decided to cut 7 layers of foam on the 104mm ID of the container tube and attach one layer of foam to the lid of the container. The single layer of foam on the lid is for two reasons:
The foam will protect the glass side of the laser power meter.
The foam will fit snugly with the inner foam sheet and hold the lid in place.
Adhesive
I just used a standard double sided tape, 24mm wide, to stick the layers together and one layer to the lid.
Laser Cut Foam Applications
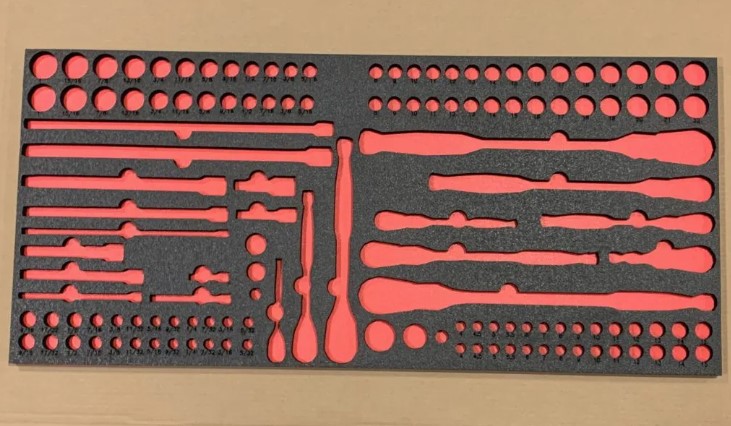
Probably the primary application for laser cut foam is foam inserts for toolboxes.
You can also use laser foam for custom packaging solutions for delicate items or drawer inserts to place items within easy access. One of my clients stored a set of love spoons in a specially designed 1300 x 500mm foam drawer insert.
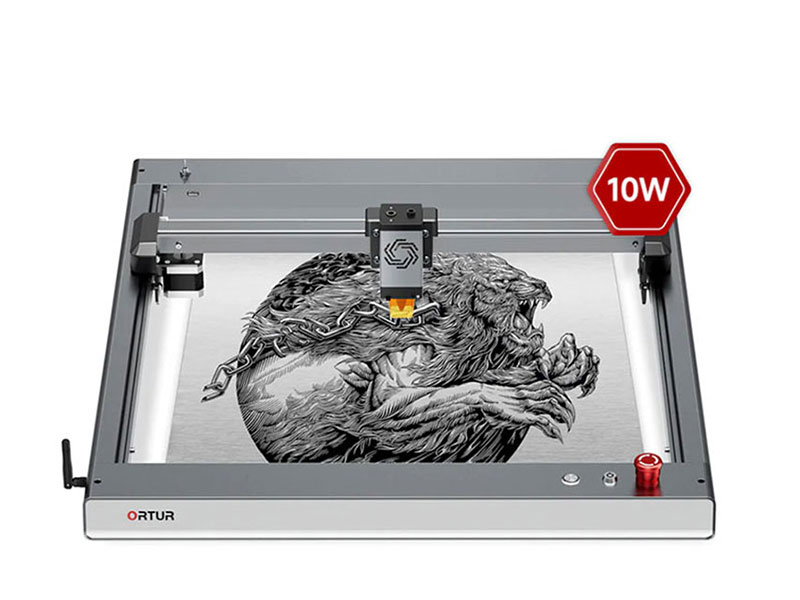
Now that you know how to laser cut foam, should you buy a laser engraving machine to experiment, so that you can better use the laser engraving machine. If you want to buy a hand-held laser engraver, then I recommend you to buy the LaserPecker 2. If you also want an engraver with cutting function, then the xTool D1 Pro and Ortur Laser Master 3 are both good choices.
Can You Laser Engrave Pink Insulating Foam?

A wide variety of insulating foams are available. Assuming you've checked that the foam is safe for laser cutting, you can safely assume that the foam is also laser-engravable.
However, while the foam will sculpt, the color contrast between the normal and sculpted surfaces may not be adequate.
You don't want to put too much energy/heat into the foam or it will start to melt. If you want deeper engraving, it's best to reduce the speed or make multiple passes.
Darker engraving on light colored foam will result in a darker marking appearance, although this is purely an optical effect.


.jpg)